My Account
 Sign Out

Last Updated Date: 4, Dec 2023
“I accidentally deleted a photo from a dinner party with my friends last week! I want to know how to recover them, I’m using an iPhone.”
“I was sorting through my Windows laptop files and mistakenly erased an entire folder containing my childhood memories. Now, I’m desperate to recover those photos!”
You must have experienced the situation mentioned above. As we move further along into the modern-day era, digital pictures are more and more integrated into our everyday lives. People may inevitably encounter photo-get-lost situations.
Lost photos are retrievable, they’re not lost forever!
It might be skeptical at first that permanently deleted pictures are retrievable, but it’s true! Lost photos could still be at the very same spot that vanished in front of you. They’re not technically gone until it has been written over. The first step to take when your photos are accidentally deleted is to stop what you are doing. By doing so, you decrease the chances of permanently losing your photos. Now, don’t panic, we are going to show you a few simple ways of retrieving your lost photos:
– How to retrieve photos on iPhone devices
– How to retrieve photos from Android devices
– How to retrieve photos on the Windows system
– How to retrieve photos on the Mac system
How to retrieve photos for iPhone users:
1. Check Recently Deleted First
The fastest way is to check and see if your lost photos could still be in the “Recently Deleted” file of your Photos app. To check, please follow these steps:
a) Under Albums in the Photos app, scroll to the very bottom, under “Utilities” look for the album titled “Recently Deleted”.
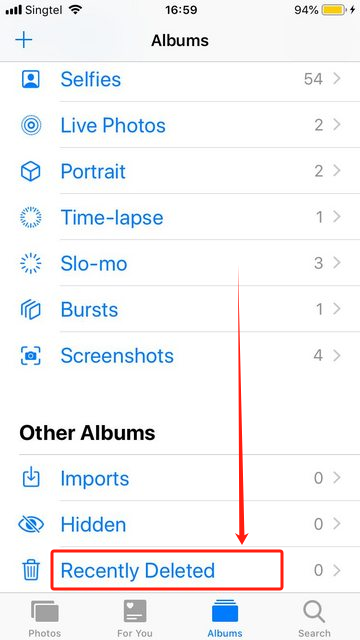
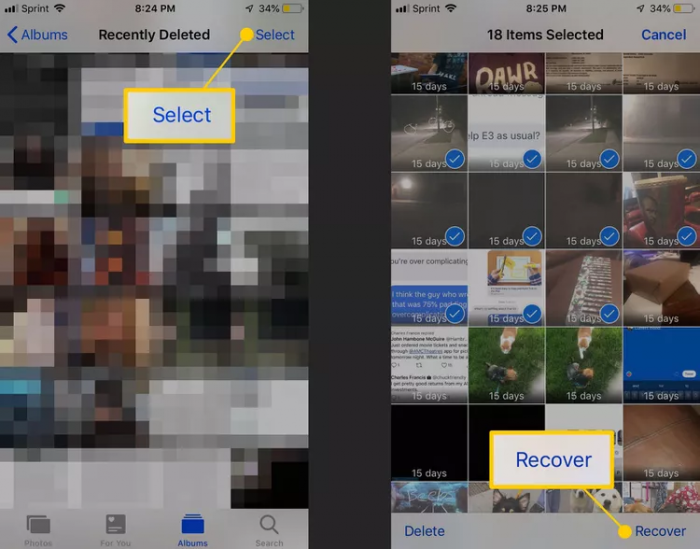
b) From there, in the upper right-hand corner choose the option “Select”. Now scroll through the pictures and look for the photos that you need to retrieve.
c) On the bottom right-hand corner choose the option “Recover”, and the photos will return to your photo album in an instant.
PS: Keep in mind that the recovered photos are filed back based on the time and date you took these photos, so you will be able to see your photos in the same location that was deleted.
d) Please note that the iPhone’s “Recently Deleted” photo file has a date countdown. Once the original photo has been deleted for over 30 days, you will not be able to retrieve your photos via this method.
2. Retrieve via iCloud Backup
For any reason that you’re not able to recover your photos with the first method, or it has been over 30 days since you deleted the pictures, try retrieving your pictures via iCloud Backup.
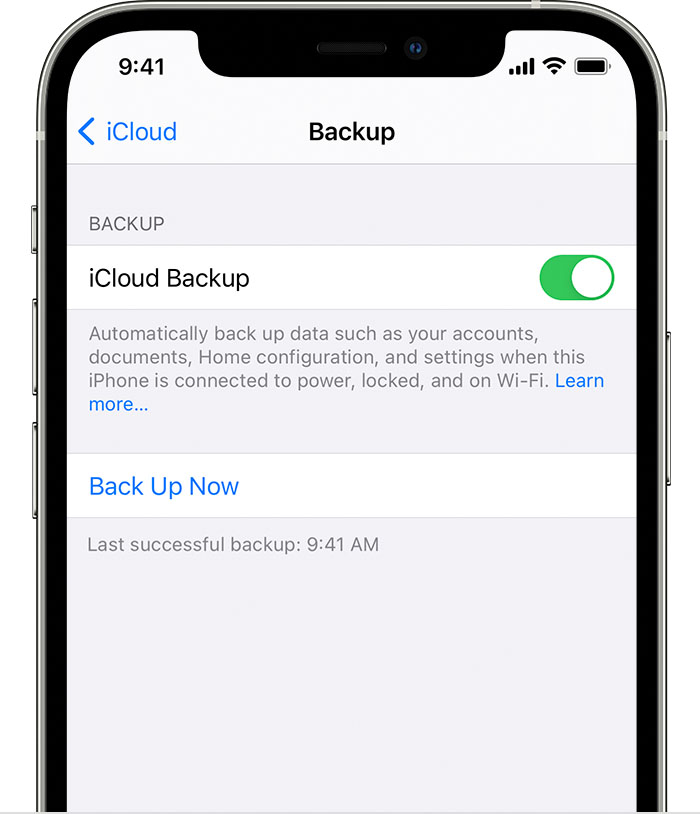
It is always a good habit to back up your phone regularly in case your phone is ever stolen or damaged. If you do back up your phone regularly, please follow these simple steps to recover your photos:
a) Under Settings, look for your name or the name the iPhone is registered under, at the very top of the list and click on it. Now please check if there is a usable backup file for you to use.
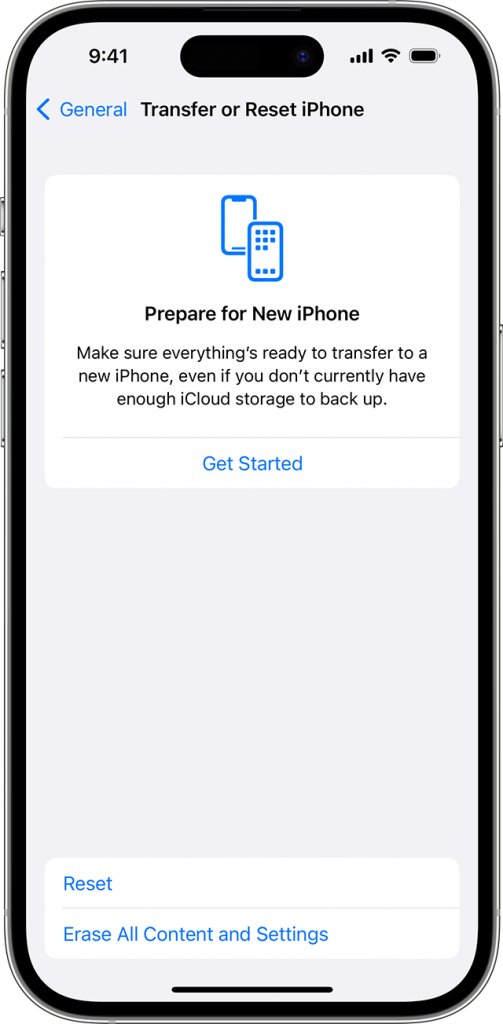
b) If there is a backup on iCloud, you will need to return to the “Settings” page, select “General”, and then select “Reset”.
c) From there, you will need to erase and reset your phone to the latest backup stored in iCloud. Please note that, once you have selected “Erase All Content and Settings” you will be prompted to sign in to your Apple ID.
d) After signing in, select “Choose Backup” and select the iCloud backup that will restore and recover your phone with the data your need.
e) Finish setting up your iPhone and you’re good to go!
3. Restore via iTunes
If you’ve tried the first two methods and you’re still not able to retrieve the photos you’ve lost, please try following these steps and see if restoration via iTunes will help:
a) First you need to connect your iPhone to your computer and open iTunes (if you do not have iTunes on your computer, especially Windows users, please download the iTunes program before attempting to recover via this method).
b) On the left-hand side of iTunes, select the iPhone device icon when it shows.
c) Then choose “Restore from backup”
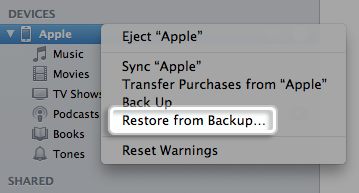
d) If you have many backups of your iPhone, please browse and select the backup that contains your lost photos to restore.
e) Select “Restore” and it should take a moment before you will be able to view the retrieved photos in the backup.
How to retrieve photos for Android users:
1. Check the Recycle Bin First
Now, have you checked your recycle bin file under the Photos app? If you haven’t, it might be a good idea to check because it is the first and easiest way to retrieve your lost photos. To access the Recently Deleted file:
- Launch the Photos App, scroll to the bottom, and locate the folder named “recycle bin”.
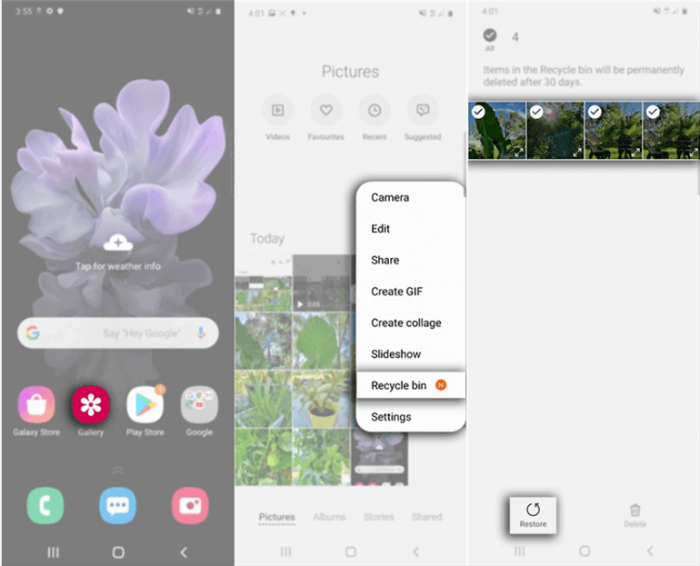
- Now you can see all the pictures you’ve deleted from the past 30 days (note that once the original photo has been deleted for over 30 days, unfortunately, you will not be able to retrieve your lost photos via this method).
- To retrieve the photos you want to recover, simply select and “Recover”.

2. Check clouds that save your photos
Compared to iPhone users, Android users have a much bigger variety in terms of how to retrieve lost data. The first thing to check is to see which clouds you have your photos saved on. Sometimes may use Google Photos more frequently while others may use Onedrive of Microsoft. Below we provide the tutorial on both Google Photos and Microsoft OneDrive, as well as using Dropbox.
a) If you use Google Photos, then you will need to retrieve your photos via the Google Photos app:
1. In the app, look for “Menu” on the top left and choose “Trash”.

2. Choose and hold on to the photos you want to recover. Then select “Restore” and your pictures should be back to where they were lost.

b) If you use Microsoft OneDrive, then you will need to retrieve your photos via the OneDrive app:
1. In the app, look for “Me” on the bottom panel and select “Recycle Bin”.
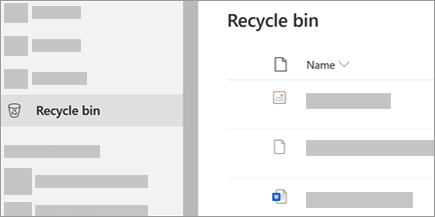
2. Choose the photos you want to recover. Then select “Restore” and the photos should return to it’s original location.
c) If you use Dropbox, then you will need to retrieve your photos via the internet browser on your Android phone:
1. With your phone’s internet browser, go to Dropbox
2. Once you’re on the website, sign on to your account.
3. On the left look for the option “Files” and choose “Deleted files”.
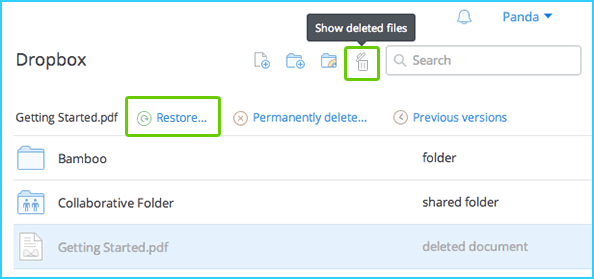
4. Select the files and photos you wish to recover and click “Restore”.
How to retrieve photos for Windows users:
1. First thing first, is to check and see if your photos are still in the “Recycle Bin” if it is, then it will be a quick fix! Just follow these steps:
a) Double-click on the “Recycle Bin” icon on your desktop (if it isn’t on your desktop, then type in “Recycle Bin” on your search bar).

b) Select all the pictures that were accidentally deleted, and right-click on the option “Restore”. In order to find the photos that are retrieved through “Restore” you need to know where it was originally saved at. If you don’t, simply make a note of the original location, or drag all the photos to your desktop or your desired folder.
c) Be patient if the deleted file is large, it may just take a moment. Please double-check once the photos that are restored, and see if all the lost photos are retrieved.
2. Same as your cell phones, backing up your computer is a good habit to maintain. So if your computer does have a backup, then please follow these steps:
a) If your computer’s backup is stored separately, please connect the external media to your computer.
b) Under “Control Panel” (if you’re unfamiliar with where to find “Control Panel”, right-click on the Windows “Start” icon and look for it). Then under “System and Maintenance” choose “Backup and Restore”.

c) Now, under “Restore my files” or “Restore all users’ files” choose the files you need to restore. To select the files you want to restore, simply choose “Browse for files” or “Browse for folders”. Keep in mind that if you choose to “Browse for folders” you will not be able to view individual files.
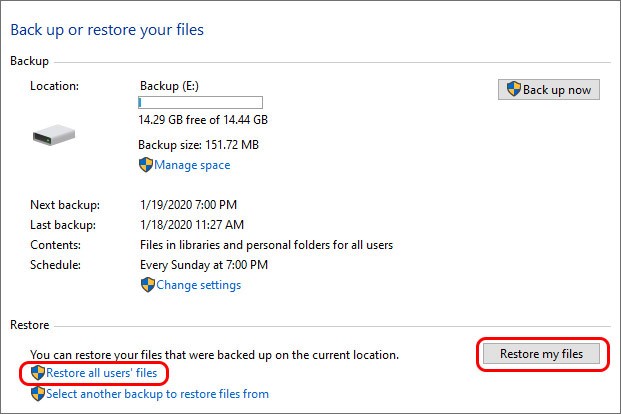
d) Finally, choose the photos and click “Restore” to bring back your lost photos.
How to retrieve photos for Mac users:
1. For Mac users, checking the “Trash Bin” on your computer is the quickest way to see if you’re able to recover your lost data instantly. To check, please follow these steps:
a) On your Mac Dock, click and select “Trash Bin” (if you’re unable to locate it, try locating it through the “Search Bar”).

b) Now, check and see if your lost photos are in the “Trash Bin”. If it is, then choose and select the photos you want to be retrieved by right-clicking on the files and choosing “Put Back”.
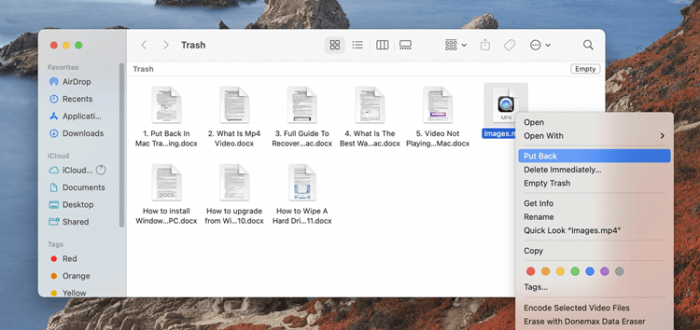
c) Once you’ve selected “Put Back” the files will return to their original location. To change where you want to save the pictures, simply drag them into the folder you want.
2. Another option for Mac users is to check and see if you have a backup on your “Time Machine”. Follow these steps to see:
a) If your computer’s backup is stored separately, please connect the external media to your computer.
b) Now open the “Finder” window to where the photos were stored. Then open “Time Machine” (if you’re not able to locate “Time Machine” try searching for it in the menu bar).
c) Search for the photos and files that you want to retrieve, and choose “Restore”.
You can also click the YouTube video link below to get more intuitive guidance.
How can I retrieve my lost photos, if all the above didn’t work?
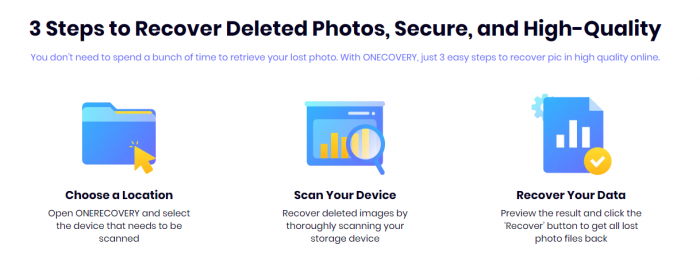
If the simple retrieval process above still doesn’t do the trick, then it is helpful to try and use a photo recovery software. ONERECOVERY is a simple and fast solution to your lost photos and files.

Follow these steps and you’re good to go:
a) Simply download and launch the ONERECOVERY program on your device, and you’re 3 easy steps away from retrieving your lost files.
b) If your computer’s lost backup is stored separately, please connect the external media to your computer.
c) The advanced program analyzes the storage medium of your choosing, and once the results are reviewed, you are ready to “restore” your lost data with the click of a button.
d) Review all the retrieved photos and choose a new location/folder to save them.
How to prevent photos get lost again?
Although it is a great relief that our lost photos are not gone forever, it would be nice not to need to panic over losing these precious snapshots. So what can we do to prevent our photos from accidentally slipping out of our hands again?
Backup, backup, backup
I cannot stress enough the importance of backing up your files because even though we have recovery programs, they are not all perfect. Sometimes some files and photos are just not retrievable anymore. So to prevent this from happening, please get into a habit of backing up all of your devices periodically!
Cloud services are nice and sweet
If you’ve got a hectic life you need to attend to, I get it. Backing up photos can get tedious, and I highly advise picking a cloud service of your choosing to prevent your photos from getting lost. Cloud services are sweet, they can offer instant uploads for all of us that just aren’t that great at maintaining our file backups.
Just be more careful
I know it gets tiring scrolling through tons of wedding, vacation, or graduation photos, but being careful and taking your time choosing which pictures to delete can save you a whole lot of trouble! So the next time you’re deleting a photo album you don’t want or mass-cleaning your pictures, please double-check and be sure that the photos you’re getting rid of are actually the ones you don’t want.
Wrap up
Now that we have run through many ways to recover your lost photos, it is still best to take precautionary steps in the very first place to prevent your photos from being lost. Snapshots of precious moments are to be treasured forever. Moments that can only be relived through photos. So by taking precautionary measures, we can decrease our chances of accidentally losing our photos. But if in the case that photos are lost, ONERECOVERY will be by your side to retrieve these special moments!
I’m a tech enthusiast specializing in computer repair and data processing. Outside of fixing gadgets, I love penning articles on computer science. Currently, I’m diving deep into AI and data recovery tech. I’m all about staying on top of the latest in these fields. Excited to bring my passion and skills to the table and collaborate on cool projects!